Sunday 18 December 2011

Christmas Cookies


The time between my last post at the end of October to now, one week away from Christmas, has gone by with the blink of an eye.

With social aspects of my life taking centre stage of late, I have been left with little time to bake, take photos and blog. I have really missed it, particularly after seeing some of the great things people have been creating on my favourite blogs.


Being one of those people that declares Christmas as their favourite time of the year, I could not miss out on doing a festive post.

A house filled with lit up Christmas scented candles, blaringly loud festive tunes and a batch of snow white frosted star shaped cookies later and I'm filled with so much joy and Christmasy good feeling.

I hope you are all enjoying the festive season too. 


These cookies, recipe by the ultimate advocate for Christmas baking and food, Nigella Lawson, are lovely. I was abit dubious about the addition of the pepper but it works nicely with the aromatic notes of the cloves and cinnamon. These are definitely going to be a regular part of my Christmas baking repertoire from now on.


Ingredients

FOR THE BISCUITS:
  • 300g plain flour, plus more for dusting 
  • pinch of salt
  • 1 teaspoon baking powder
  • 1 teaspoon ground cinnamon
  • ¼ teaspoon ground cloves
  • 1–2 teaspoons freshly ground black pepper 
  • 100g soft butter
  • 100g soft dark sugar
  • 2 large eggs, beaten with 4 x 15ml table-spoons runny honey

FOR THE ICING AND TRIMMINGS:
  • 300g instant royal icing, from a packet 
  • edible gold or silver balls or sprinkles 
  • florists’ ribbon for hanging

Serves: 35 - 40

  1. Line 2 baking sheets with parchment and preheat the oven to 170°C/gas mark 3.
  2. Combine the flour, salt, baking powder, cinnamon, cloves and pepper in a food processor and, with the motor on, add the butter and sugar, then, slowly, the beaten eggs and honey, though don’t use all of this liquid if the pastry has come together before it’s used up.
  3. Form 2 fat discs and put one, covered in clingfilm or in a freezer bag, in the fridge while you get started on the other.
  4. Then dust a work surface with flour, roll out the disc, also floured, to about 5mm and cut out your Christmas decorations with cutters of your choice, which could include fir-tree shapes, angels, stars, snowflakes, and so on.
  5. Re-roll and cut out some more, setting aside the residue from this first disc, well covered, while you get on with rolling out the second. When you’ve got both sets of leftover clumps of dough, roll out and cut out again, and keep doing so till all the dough’s used up.
  6. Now take a small icing nozzle and use the pointy end to cut out a hole just below the top of each biscuit (through which ribbon can later be threaded).
  7. Arrange the pastry shapes on the lined baking sheets and cook for about 20 minutes: it’s hard to see when they’re cooked, but you can feel; if the underside is no longer doughy, they’re ready. Transfer to a wire rack and leave to cool.
  8. Make up the instant royal icing, beating it until it’s thick enough to be able to cover the biscuits with a just-dripping blanket of white; but don’t beat it for as long as the packet says or you’ll have icing so thick it will need to be spread with a spatula and you won’t get such a neat outline.
  9. Carefully ice the cold decorations, using a teaspoon (the tip for dripping, the back for smoothing), and scatter sparkles or sprinkles as you like. When the icing is set, thread ribbon through the holes and hang on your tree.

MAKE AHEAD TIP:

Make the biscuits up to 1 week ahead and store in an airtight container. Ice the biscuits the day before needed to allow them plenty of time to set.


FREEZE AHEAD TIP:

The raw cookie dough can be made and frozen for up to 1 month. Thaw in the fridge overnight.  The cooked biscuits can be made and frozen in sealable bags for up to 6 months.

Enjoy!

Sunday 23 October 2011

Adjusting my focus and Chocolate Profiteroles


A recent trip to visit my lovely friend Smita in London made me realise how little I have focused on my surroundings recently. Thoroughout my visit, had Smita not spotted and pointed out the array of celebrities we walked by, or the huge Armani underwear advert on the bus featuring a very buff Rafael Nadal,  I would have been non the wiser to their nearby presence. It made me wonder, what else have I failed to notice?

My field of vision seems to have gone askew lately, too busy thinking about plans for the future. What I've come to realise is that I need to take more time to really see what is right in front of me, otherwise I could risk missing out on the wonderful opportunities that life has to offer.

Photography is something that helps me narrow in on the finer details of certain subjects. But, I've been abit shy about wielding my Canon 40D in public, favouring photography in the comfort of the indoors and with people I know. Again, this very blinkered approach has only recently come into my awareness. I need to overcome the embarrassment, either that or buy a smaller, less conspicuous camera.

For now, here are afew delicious treats I sampled during my London trip:

Earl Grey Cupcake at Primrose Bakery, so posh you even get a doily with it


Portugese Custard Tart from Borough Market, flakey buttery pastry and smooth, sweet, burnished custard, heavenly.

Laduree Macarons - Chocolate, Coffee, Salted Caramel and Praline, delicate and devine.  


Now back to the profiteroles, which was on the agenda at this months Cake Club. Chocolate profiteroles are a dessert I can rarely resist ordering at a restaurant. Who knew how little ingredients are needed and how easy these were to make?


The original recipe called for us to also make a caramel sauce, which unfortunately completely defeated us, even after 3 attempts.  Luckily Caroline had some spare chocolate and knocked up a decadent chocolate sauce to drizzle over the cream filled choux buns. All I can say is that these were incredibly good and will need to be made again.


Recipe - Chocolate Profiteroles by Gary Rhodes

Ingredients
  • 75g plain flour
  • pinch of salt
  • 2 eggs lightly beaten
  • 55g butter, finely diced
  • 150ml cold water
For the filling:
  • 300ml double or whipping cream
  • 2 tsp caster sugar
For the sauce
  • 150ml water
  • 250g caster sugar
  • 250ml double cream
- We melted some chocolate and butter and stirred in some double cream to make the chocolate sauce.

Serves 4
Directions
1) Dampen the baking tray under the cold tap after greasing it - this creates steam and helps the buns to rise. Pre heat the oven to 200 degrees C / 400 degrees F.

2) Fold the grease proof paper in half and unfold to leave a crease. Sift flour and salt onto the grease proof paper.

2) Bring the butter and water to boil. Add all the flour in one go and beat to a smooth dough over a low heat. Cool for 10 minutes.

3) Gradually beat in the egss with a wooden spoon until the paste is smooth and stands in peaks. Make sure each amount is fully blended before adding any more egg.

4) Spoon 16 individual teaspoons of the paste onto the tray. Bake for 20 minutes, until crisp and golden. If your oven is very hot, reduce to 190 degrees C / 375 degrees F halfway through baking.

5) Slit the sides of the cooked choux buns with a sharp knife. Leave to cool completely on a wire rack. This lets any steam inside escape and keeps them crisp.

6) For the sauce, dissolve the sugar in the water, then simmer until brown. Remove from the heat. Warm the cream separately, then stir into the hot caramel. Simmer for 5 minutes.

7) For the filling, whip the cream and the sugar in a bowl until stiff peaks form. Spoon into the buns, then arrange on plates and serve with warm sauce poured over the top.

Notes - The choux paste and caramel sauce can be made a day in advance and the cream whipped up to 4 hours ahead of serving. The choux pastry cases should not be filled more than 30 minutes before serving or the pastry will become soggy.

Monday 3 October 2011

Iced Finger Buns


Whilst people have been posting some great recipes on the blogs I follow, things have been alittle quiet around here at With Milk & Flour.

The list of new recipes I want to try has been growing, but due to trips away and feeling unwell, admittedly the motivation has been somewhat lacking.
  
In the end it was greed that drove me back into the kitchen, delving into unchartered baking waters. Despite my fear of baking bread, when I watched last weeks episode of The Great British Bake Off, I knew I needed to make these Iced Finger Buns.  


The recipe is one by Paul Hollywood, judge on the GBBO and baker extraordinaire for celebrities. I can see why they used this recipe in the technical challenge round. These iced buns tested an array of baking skills.

How the bakers managed to hold the bun open with one hand whilst piping cream into the middle with the other, all whilst keeping everything looking neat and pretty is beyond me. 

The test of manual dexterity and mass of washing up involved was well worth it. These buns were such a delicious treat.


The smell of these buns coming out of the oven was lovely. Being new to baking bread, I get so much gratification from the heady scent it infuses into the kitchen.   

Literally as soon as the jam had been piped onto the last bun, we all dived in. The first bite was just heavenly. The buns had a slightly crisp texture to its outer shell, a nice contrast to the soft bread and creamy, jammy middle.

Sweet soft bread, icing, cream and jam, how can you resist such a combination?


                           Iced Finger Buns by Paul Hollywood

Makes 12

For the dough
  • 500g strong white bread flour
  • 2 x 7g packets fastaction dried yeast
  • 50g caster sugar
  • 40g unsalted butter, softened
  • 2 large free-range eggs
  • 10g sea salt flakes, crushed
  • 140ml lukewarm water
For the icing and filling
  • 300g icing sugar
  • 42ml cold water (I needed alittle more for a runnier consistency of icing sugar)
  • 200ml whipping cream
  • 1 x 400g jar strawberry jam, warmed and sieved, then cooled
You will also need:
2 baking sheets, lined with baking paper; a piping bag; a small plastic bag 

Method
  1. Put all the ingredients for the dough into a large mixing bowl with 100ml water. Mix together with your hands until a dough is formed. Slowly work in 40ml water and massage the dough in the bowl for about 4 minutes.
  2. Tip the dough onto a lightly floured worktop and knead well for 10 minutes or until the dough is smooth and elastic. Return to the bowl and cover with a damp tea towel. Leave to rise for 1 hour.
  3. Tip the dough out onto the very lightly floured worktop again and divide into 12 pieces. Roll into balls and then into ‘fingers’ about 12.5cm long.
  4. Divide the fingers between the baking sheets, leaving plenty of space around and between them to allow for spreading. Leave to rise, uncovered, for about 40 minutes or until doubled in size. Towards the end of the rising time, preheat the oven to 220°C/425°F/gas 7. Bake the fingers for about 10 minutes. Leave to cool on a wire rack.
  5. For the icing, sift the icing sugar into a bowl. Gradually stir in 42ml cold water to make a thick paste. When the fingers have completely cooled, split them open lengthways, not cutting all the way through. Dip one side of each finger into the icing and smooth it with your finger. Leave to set on a wire rack.
  6. Lightly whip the cream until thick and place in the piping bag. Pipe a generous line of whipped cream into each finger. Spoon the cooled sieved strawberry jam into a small plastic bag and snip off one corner. Pipe a delicate line of jam onto the cream in each finger
Notes
-Icing sugar slightly too thick, needed alittle more water for a more spreadable consistency
-Very difficult to hold bun open and pipe cream into it at the same time. Will slice the buns in two the next time.
-Buns were quite brown, will either turn down the temperature of the oven next time or cook in 2 batches.
-Whipped cream needed to be firmer, needed further whipping to obtain a stiffer consistency
     Enjoy!


    Tuesday 13 September 2011

    Cinnamon Buns with Cream Cheese Glaze


    Since my disappointing attempt at the Orangette Cinnamon Buns last week, I have been doing abit of research on the various methods of making Cinnamon Buns.  

    I tend to learn better via visual demonstration and found the numerous videos on this subject really useful. I especially liked this video which I found on YouTube.


    How sweet is this lady? She is so calm and laidback, I could happily watch her baking all day. I like to think she was using a family recipe that has been passed down from generations of women before her. 

    Having gathered some tips from afew demonstrations, I was feeling more confident and optimistic about my second attempt.  It was like a light bulb had gone off in my head when I got the dough to the right consistency and was able to roll it out. I'll admit, I even punched the air in a celebratory fashion.

    Whilst the buns didnt turn out looking perfect, they were alittle on the flat and irregular shaped side, they tasted really good. The buns were really just a vehicle for the delicious frosting, which was a nice balance of sweet and savoury to go with the cinnamon and brown sugar mix. 
     
    Once where yeast and dough seemed scary and impossible, persevering with these buns has now opened up a whole range of recipes for me to explore.


    Recipe - Cinnamon Buns with Cream Cheese Glaze by Orangette


    Ingredients - Dough

    1 Cup Whole Milk
    3 Tablespoons/43g Unsalted Butter
    3 1/2 Cups/385g Plain (ap) Flour (i needed about 3 tbsp more)
    1/2 Cup/115g Granulated sugar
    1 Large Egg
    2 1/4 Teaspoons Rapid-Rise Yeast 
    1 Teaspoon Salt
    Nonstick Spray or Vegetable Oil

    Filling
    3/4 Cup/150g Golden Brown Sugar (I used soft dark brown)
    2 Tablespoons Ground Cinnamon 
    1/4 Cup, 1/2 Stick, 57g Unsalted Butter

    Glaze 
    113g Cream Cheese
    1 Cup/110g Icing Sugar
    1/4 Cup, 1/2 Stick, 57g Unsalted Butter
    1/2 Teaspoon Vanilla Extract

    1. Combine milk and butter in glass measuring cup. Microwave on high until butter melts and mixture is warmed to 120°F to 130°F, 30 to 45 seconds.

    2. Pour into bowl of stand mixer fitted with paddle attachment. Add 1 cup/110g of the flour, sugar, egg, yeast, and salt. Beat on low speed 3 minutes, stopping occasionally to scrape down sides of bowl.

    3. Add 2 1/2 cups/remaining 275g flour. Beat on low until flour is absorbed and dough is sticky, scraping down sides of bowl. If dough is very sticky, add more flour by tablespoonfuls until dough begins to form a ball and pulls away from sides of bowl. I needed an extra 2 & 1/2 tablespoons of flour and the dough was still alittle sticky.

    4. Either turn the dough out onto a very well floured surface and knead for about 8 minutes until smooth and elastic, or continue using the mixer with the dough hook attached. 

    5. Transfer the dough into a lightly oiled bowl, cover with cling film and then a kitchen towel. Let the dough rise for about 2 hours or until dough as doubled in size. This is best done in a warm draft free area.

    6. In a bowl mix the sugar, cinnamon, and salt set aside.


    7. Punch down the dough, transfer to a floured surface and roll out into a 15×11 inch rectangle. Spread the butter across this leaving a half inch border, sprinkle this with the sugar mixture. 

    8. Roll the dough into a tight log along the long edge


    9. With seam side down, cut dough into 18 equal slices (each about 1/2 to 3/4 inch wide).


    10. Oil two 9 inch glass baking dishes (I used metal worked fine) and line each dish with half the rolls. Cover again with cling film and kitchen towel and let rise for a final 45 mins at least till doubled in size.

    11. Position rack in center of oven and preheat to 375°F/190°C . Bake rolls until tops are golden, around 20 minutes. Remove from oven and invert immediately onto rack. Cool 10 minutes. Turn rolls right side up.


    12. Working with a Stand mixer with the paddle attached blend the butter till creamy, add the cream chesse and beat till incorporated then work the sugar in and finally the vanilla. Spread on still warm rolls for the best enjoyment


    Sunday 4 September 2011

    Snickerdoodle Cupcakes with Cinnamon Cream Cheese Frosting

    Having book marked Orangettes recipe for Cinnamon Buns almost 6 months ago, i thought it was time to face my fear of anything involving yeast. After all, i dont think you can legitimately call yourself a food blogger without the ability to bake bread. Or at least attempt to. For someone who enjoys baking, not knowing how to bake bread is sort of like being a driving instructor who has never changed a car tyre, missing an integral skill needed to do the job better.

    So with enthusiasm and abit of anxiety, i followed the first step in the method for making the Cinnabon Buns. I wont bore you with the details, but needless to say, something went wrong and the dough was so sticky i couldnt roll it.

    I'm not sure what went wrong, but being inexperienced in all things dough related (damn my fear of yeast!), i was unable to salvage it.


    Feeling very disappointed in myself and massively craving cinamon and cream cheese frosting, I googled a recipe for cupcakes involving the two ingredients. I came across Stephanies Kitchens recipe for these cupcakes. 


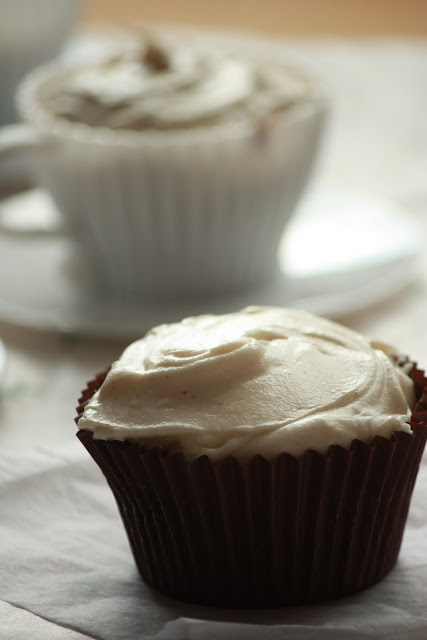
    These cupcakes were quite nice, but they didnt rise very much. That might have been somthing to do with the size of the cases. I used Muffin cases as they were the only ones i had in the cupboard. I also used the pretty silicone cup and saucer cases my lovely friend Kay bought me for my birthday.

    Furthermore, the frosting was very sweet and ultimately put people off eating more than one. 

    So all in all, not a very successful day in the kitchen. In the days before this blog, I would have taken it very personally that both recipes were abit of a flop. 

    However, I have done enough baking now to know that sometimes, good recipes turn out bad. The way i see it, there are so many variables involved in baking, its a case of learning from each attempt and adapting things the next time.


    I'm definitely going to try the Cinnamon Buns again and overcome my fear of yeast. And no, I have never changed a car tyre. But luckily for me, i'm not a driving instuctor.

    Recipe - Snickerdoodle Cupcakes with Cinnamon Cream Cheese Frosting by Stephanies Kitchen

    makes 18 cupcakes
    1 1/2 cups cake flour (or add 1 tablespoon cornstarch per 1 cup all purpose flour to make your own cake flour)
    1/2 tablespoon baking powder
    1/4 teaspoon salt
    1/2 tablespoon cinnamon
    1/2 cup butter, at room temperature
    1 cup sugar
    2 eggs
    1 teaspoon vanilla
    2/3 cup milk

    In a medium bowl, whisk together the flour, baking powder, salt and cinnamon. Set aside. Using a mixer, cream the butter and sugar. Add the eggs and vanilla. Slowly add the flour and milk, alternating between the two until well incorporated. Be sure to scrape down the sides of the bowl whenever needed. Line a muffin pan with cupcake liners. You will need 18. Evenly distribute the batter between the cups. Bake at 350 degrees for about 18-20 minutes. Top with Cinnamon Cream Cheese Frosting and sprinkle a bit of cinnamon-sugar on top for extra prettiness.

    Cinnamon Cream Cheese Frosting
    4 ounces cream cheese, at room temperature
    4 tablespoons butter, at room temperature
    4 1/2 cups confectioners’ sugar
    1/4 cup milk
    1 teaspoon vanilla
    1/2 teaspoon cinnamon
    Cream the cream cheese and butter until creamy and smooth. Add half the sugar, milk, vanilla and cinnamon. Mix until smooth. Add remaining sugar and beat until light and fluffy and creamy.

    Sunday 28 August 2011

    The Seven Links Challenge

    Every sunday morning i like to go through the list of blogs i enjoy following. Its my version of reading the sunday newspaper. Except that instead of catching up on current affairs, I'm reading about food and stories of what each blogger has been up to that week.

    So it was really nice to discover that i have been invited by the  talented and lovely Caroline over at Sweetcarolinescooking to participate in the Seven Links Challenge. This involves sharing seven different categories of my past posts. 

    Within the challenge i also need to list five other food bloggers to pass the challenge on to. This again is another tough one. Since starting With Milk and Flour, i have come across so many amazing blogs. Here are five from my long list of favourite food blogs that i would like to pass the challenge on to:


    Now for food bloggers such as Caroline, who have many wonderful recipes on their blog, the challenge will have been in narrowing down which posts to choose. My challenge is fitting in the small number of posts i have from the blog into the categories.

    Here it goes:

    The Most Beautiful Post: I'm rarely completely satisfied with the way my food looks or my photos of them. However, in terms of lighting, composition, the colours and materials i used, i pick the Peanut butter and chocolate-chip cookies post


    The Most Popular: The post on Food Films has generated the most hits, but surprisingly the least comments.


    The Most Controversial Post: I'm way to conservative to be controversial. Here I'm going to mention the Salmon and broccoli bake as it was my first savoury dish, as opposed to sweet, which was made involving the use of milk and flour. 


    The Most Helpful Post: I've yet to post anything that is particularly helpful other than to make people feel hungry. However, if you ever wake up feeling in need of cheering up, these Chocolate Chip Pancakes will definitely do the job.


    The Most Surprisingly Successful Post: I was really surprised at how well received the Strawberry Meringue Layer Cake was, as it didnt turn out to be as visually pleasing as i would have liked. Everyone who ate this commented, several times, on how much they loved it. Which goes to show, looks arent everything. 


    The Most Under Rated Post: This Lime Coconut Semifreddo didnt get much of a look in, though that might of been partly down to the uninspired photo. Make this for anyone who loves lime and coconut, its delicious.


    The Most Proud of Post: These Orange Custard Cream Cupcakes were my first attempt at making cupcakes with a custard centre. Having been involved in afew custard splitting situations, I was so happy when they turned out well without problems. I was also pleased to be able to capture, in the photos, the sunshine inducing attributes of the cupcakes on that rainy dreary day.


    Sunday 21 August 2011

    Strawberry Meringue Layer Cake

    Every year, towards the end of August i get a familiar feeling of change and with it a mild anxiety. With the weather being so good at the moment, the change is almost imperceptible. But with the nights drawing in alittle sooner and children being prepared for their return to school, to me it spells the ending of another Summer. 

    This anxiety is most certainly a trace of feeling left over from my school days. It was the lack of routine that came with the holiday breaks that i revelled in. Having never been a morning person, I always remember resenting having to wake up early in the morning for school 5 days a week. 


    For me the new term has already started. I returned to work after over a week off to find a new batch of doctors in the hospital i work in and that same yearning for a lie in.

    It was therefore fitting that, in an attempt to retain the spirit of Summer, I made Nigella Lawsons Strawberry Meringue Layer Cake for our family games night.


    This is a lovely cake. Every folkful is a taste of Summer. The meringue in the cake gives it a light and delicate texture. The balance of cream and strawberries with the meringue instantly transports me back to the days of the start of the school holidays, where long days, trips away and plenty of sunshine lay ahead.


    My sister Mel took the above photo with her Iphone 4, i'm liking the retro feel of it.


    Recipe - Strawberry Meringue Layer Cake from the book Forever Summer by Nigella Lawson

    Ingredients
    • 125g plain flour
    • 25g cornflour
    • 1 1/2 tsp baking powder
    • 100g very soft unsalted butter
    • 300g caster sugar
    • 4 eggs
    • 2 tsps pure vanilla extract
    • 2 tblspns milk
    • 50g flaked almonds
    • 375ml double cream (I added 2 tablespoons of sugar as sometimes strawberries aren’t as sweet as you want them to be)
    • 250g strawberries
    Method
    1. Preheat oven to 200C. Line, butter and flour two 22cm springform tins.|
    2. Weigh out the flour, cornflour and baking powder into a bowl.
    3. Cream the butter and 100g of the caster sugar in another bowl until light and fluffy.
    Separate the eggs and beat the yolks into the butter and sugar, saving the whites to whisk later. Gently fold in the weighed-out dry ingredients, add the vanilla, then sir in the milk to thin the batter. Divide the mixture between the two prepared springform tins.
    4. Whisk the egg whites until soft peaks form, then gradually add the remaining 200g caster sugar. Spread a layer of meringue on top of the sponge batter in each tin and sprinkle the almonds evenly over.
    5. Bake for 30-35 mins, by which time the top of the almond-scattered meringues will be a dark gold. (I turned down the temperate to 180C as my oven is fan forced and the top was a little too cooked so perhaps turning it down even further would be better)

    Enjoy!

    Wednesday 10 August 2011

    Peanut Butter & Chocolate Chip Cookies


    Peanut butter cookies immediately transport me back to my childhood. They were the first things i ever baked in primary school. I can still remember the heady smell of peanut butter and the small sense of pride i felt as the freshly baked cookies came out of the oven. 


    I suspect the memory of those cookies as a child, has largely shaped the interest i have in baking as an adult. Now as an adult, i can appreciate the science and precision involved in baking, but still get that same feeling of joy i had as a child from creating something delicious and sweet.  

    When my little sister wanted to do some baking this evening i went to How Sweet Eats recipe for Peanut and Chocolate Chip Cookies. I'm so glad i discovered her blog, the beautifully shot photos always leave me wanting to try the recipes.


    These cookies were quick to make and well received by our other sister. I liked the texture, a soft centre and slightly crispy outer shell. However, they werent quite peanutty enough for me and alittle too sweet. Next time i will increase the amount of peanut butter and try caster sugar instead of granulated.


    Recipe for Peanut butter and chocolate chip cookies by http://www.howsweeteats.com/2011/08/puffy-peanut-butter-cookies-with-chocolate-chips/

    Yield: 18-22 cookies

    Ingredients
    2 cups all-purpose/plain flour
    1/2 teaspoons baking soda/baking powder
    8 tablespoons/113g of salted butter, melted and cooled
    6 tablespoons/85g of creamy peanut butter, melted and cooled
    1 cup brown sugar
    1/2 cup sugar - i used granulated sugar
    1 egg + 1 egg yolk, at room temperature
    2 teaspoons vanilla extract
    1 1/2 cups/262g chocolate chips

    Method
    Preheat oven to 325 degrees F/160 degrees C. Add butter and peanut butter to a microwave safe bowl, and heat in 30 second increments until melted. Let cool completely.

    Mix the flour and baking soda in a bowl and set aside. In another bowl, mix the cooled butter/peanut butter and sugars until they are combined. Add the egg, egg yolk, and vanilla and stir until mixed. Gradually add flour and mix until a dough forms – it will look crumbly at first, but it will come together. I even used my hands to bring it all together. If necessary, add 1-2 teaspoons of milk, but I did not need this. Fold in chocolate chips.

    Shape the dough into a ball the size of a golfball. Place on a baking sheet two inches apart and bake for 10-12 minutes or until the edges are slightly brown. The centers should be soft and puffy. Careful not to over bake.


    Note - These cookies tasted more peanutty and less sweet the day after baking, inspiring me to re-shoot the photos.
     
    Enjoy!


    Tuesday 9 August 2011

    Big Brunch Tomato Eggs

    Confession time. Everyday for the past 4 days, since turning a year older, i have been eating chocolate for breakfast. Slowly and happily, i have been working my way through the bounty of delicious confectionary given to me by thoughtful friends and family. A slab of chocolate in one hand, a cookery book in the other, i have been immersed in food heaven. I'm choosing not to mention about the week of birthday celebrations involving copious amounts of food and cake.


    The downside to all this indulgence is that i have stopped exercising and have not so much as glanced at the bowl of fruit sitting in the kitchen.

    Time to reign it in. Instead of a slab of chocolate, i kick started the day with a less sugar loaded meal, a plate of these Big Brunch Tomato Eggs and a pomegrante and ginger beer drink. 

    Whilst i have thoroughly enjoyed all the chocolate and good food, my body was very grateful to receive a hefty dose of vitamins and minerals this morning.


    Recipe - Big Brunch Tomato Eggs by Donal Skehan http://www.donalskehan.com/2010/05/big-brunch-tomato-eggs/

    Ingredients
    2 tablespoons of olive oil
    1 small onion, finely chopped
    2 garlic cloves, finely chopped
    400g tin of chopped tomatoes
    A good handful of spinach, roughly chopped
    A small handful of basil, roughly chopped
    4 large free range eggs
    A little grated Parmesan cheese to serve
    A generous pinch of sea salt and black pepper

    Method
    In a large frying pan heat the oil and fry the onion and garlic slowly for 7-10 minutes until soft but not coloured.

    Add the chopped tomatoes and simmer for 10 minutes or until the sauce thickens.

    Stir through the basil and spinach until it has wilted.

    With the back of a spoon make four wells in the sauce and then crack the eggs in. Make sure the wells are deep enough for the eggs to sit in, otherwise they will spread around the tomato mixture.

    Cook the eggs in the sauce until the white is cooked through and the yolk is still soft. Place a lid on top to speed up the process.

    Season with sea salt and black pepper and a good sprinkle of Parmesan cheese.

    In the spirit of healthy eating, i ate these without anything to accompany them. However, these would be great with some potato waffles or toast.

    Enjoy!