Showing posts with label cookies. Show all posts

Sunday, 18 December 2011

Christmas Cookies


The time between my last post at the end of October to now, one week away from Christmas, has gone by with the blink of an eye.

With social aspects of my life taking centre stage of late, I have been left with little time to bake, take photos and blog. I have really missed it, particularly after seeing some of the great things people have been creating on my favourite blogs.


Being one of those people that declares Christmas as their favourite time of the year, I could not miss out on doing a festive post.

A house filled with lit up Christmas scented candles, blaringly loud festive tunes and a batch of snow white frosted star shaped cookies later and I'm filled with so much joy and Christmasy good feeling.

I hope you are all enjoying the festive season too. 


These cookies, recipe by the ultimate advocate for Christmas baking and food, Nigella Lawson, are lovely. I was abit dubious about the addition of the pepper but it works nicely with the aromatic notes of the cloves and cinnamon. These are definitely going to be a regular part of my Christmas baking repertoire from now on.


Ingredients

FOR THE BISCUITS:
  • 300g plain flour, plus more for dusting 
  • pinch of salt
  • 1 teaspoon baking powder
  • 1 teaspoon ground cinnamon
  • ¼ teaspoon ground cloves
  • 1–2 teaspoons freshly ground black pepper 
  • 100g soft butter
  • 100g soft dark sugar
  • 2 large eggs, beaten with 4 x 15ml table-spoons runny honey

FOR THE ICING AND TRIMMINGS:
  • 300g instant royal icing, from a packet 
  • edible gold or silver balls or sprinkles 
  • florists’ ribbon for hanging

Serves: 35 - 40

  1. Line 2 baking sheets with parchment and preheat the oven to 170°C/gas mark 3.
  2. Combine the flour, salt, baking powder, cinnamon, cloves and pepper in a food processor and, with the motor on, add the butter and sugar, then, slowly, the beaten eggs and honey, though don’t use all of this liquid if the pastry has come together before it’s used up.
  3. Form 2 fat discs and put one, covered in clingfilm or in a freezer bag, in the fridge while you get started on the other.
  4. Then dust a work surface with flour, roll out the disc, also floured, to about 5mm and cut out your Christmas decorations with cutters of your choice, which could include fir-tree shapes, angels, stars, snowflakes, and so on.
  5. Re-roll and cut out some more, setting aside the residue from this first disc, well covered, while you get on with rolling out the second. When you’ve got both sets of leftover clumps of dough, roll out and cut out again, and keep doing so till all the dough’s used up.
  6. Now take a small icing nozzle and use the pointy end to cut out a hole just below the top of each biscuit (through which ribbon can later be threaded).
  7. Arrange the pastry shapes on the lined baking sheets and cook for about 20 minutes: it’s hard to see when they’re cooked, but you can feel; if the underside is no longer doughy, they’re ready. Transfer to a wire rack and leave to cool.
  8. Make up the instant royal icing, beating it until it’s thick enough to be able to cover the biscuits with a just-dripping blanket of white; but don’t beat it for as long as the packet says or you’ll have icing so thick it will need to be spread with a spatula and you won’t get such a neat outline.
  9. Carefully ice the cold decorations, using a teaspoon (the tip for dripping, the back for smoothing), and scatter sparkles or sprinkles as you like. When the icing is set, thread ribbon through the holes and hang on your tree.

MAKE AHEAD TIP:

Make the biscuits up to 1 week ahead and store in an airtight container. Ice the biscuits the day before needed to allow them plenty of time to set.


FREEZE AHEAD TIP:

The raw cookie dough can be made and frozen for up to 1 month. Thaw in the fridge overnight.  The cooked biscuits can be made and frozen in sealable bags for up to 6 months.

Enjoy!

Wednesday, 10 August 2011

Peanut Butter & Chocolate Chip Cookies


Peanut butter cookies immediately transport me back to my childhood. They were the first things i ever baked in primary school. I can still remember the heady smell of peanut butter and the small sense of pride i felt as the freshly baked cookies came out of the oven. 


I suspect the memory of those cookies as a child, has largely shaped the interest i have in baking as an adult. Now as an adult, i can appreciate the science and precision involved in baking, but still get that same feeling of joy i had as a child from creating something delicious and sweet.  

When my little sister wanted to do some baking this evening i went to How Sweet Eats recipe for Peanut and Chocolate Chip Cookies. I'm so glad i discovered her blog, the beautifully shot photos always leave me wanting to try the recipes.


These cookies were quick to make and well received by our other sister. I liked the texture, a soft centre and slightly crispy outer shell. However, they werent quite peanutty enough for me and alittle too sweet. Next time i will increase the amount of peanut butter and try caster sugar instead of granulated.


Recipe for Peanut butter and chocolate chip cookies by http://www.howsweeteats.com/2011/08/puffy-peanut-butter-cookies-with-chocolate-chips/

Yield: 18-22 cookies

Ingredients
2 cups all-purpose/plain flour
1/2 teaspoons baking soda/baking powder
8 tablespoons/113g of salted butter, melted and cooled
6 tablespoons/85g of creamy peanut butter, melted and cooled
1 cup brown sugar
1/2 cup sugar - i used granulated sugar
1 egg + 1 egg yolk, at room temperature
2 teaspoons vanilla extract
1 1/2 cups/262g chocolate chips

Method
Preheat oven to 325 degrees F/160 degrees C. Add butter and peanut butter to a microwave safe bowl, and heat in 30 second increments until melted. Let cool completely.

Mix the flour and baking soda in a bowl and set aside. In another bowl, mix the cooled butter/peanut butter and sugars until they are combined. Add the egg, egg yolk, and vanilla and stir until mixed. Gradually add flour and mix until a dough forms – it will look crumbly at first, but it will come together. I even used my hands to bring it all together. If necessary, add 1-2 teaspoons of milk, but I did not need this. Fold in chocolate chips.

Shape the dough into a ball the size of a golfball. Place on a baking sheet two inches apart and bake for 10-12 minutes or until the edges are slightly brown. The centers should be soft and puffy. Careful not to over bake.


Note - These cookies tasted more peanutty and less sweet the day after baking, inspiring me to re-shoot the photos.
 
Enjoy!


Monday, 25 July 2011

A day at the park followed by Cheesecake Chocolate Chip Cookie Bars


The weather was beautiful yesterday and perfect for a get together with friends in the park. Though as you can see from the following photos, my outdoor photography has a long way to go!

We had a picnic, involving a mish mash of food we had individually chosen to bring to eat, to fuel our energetic efforts on the tennis court.  


In order to work our cerebral muscles, a game of Scrabble followed the tennis.


Can you spot the food related words? 

We Dietitians, plus one Personal Trainer, cant help but always have food on the brain.

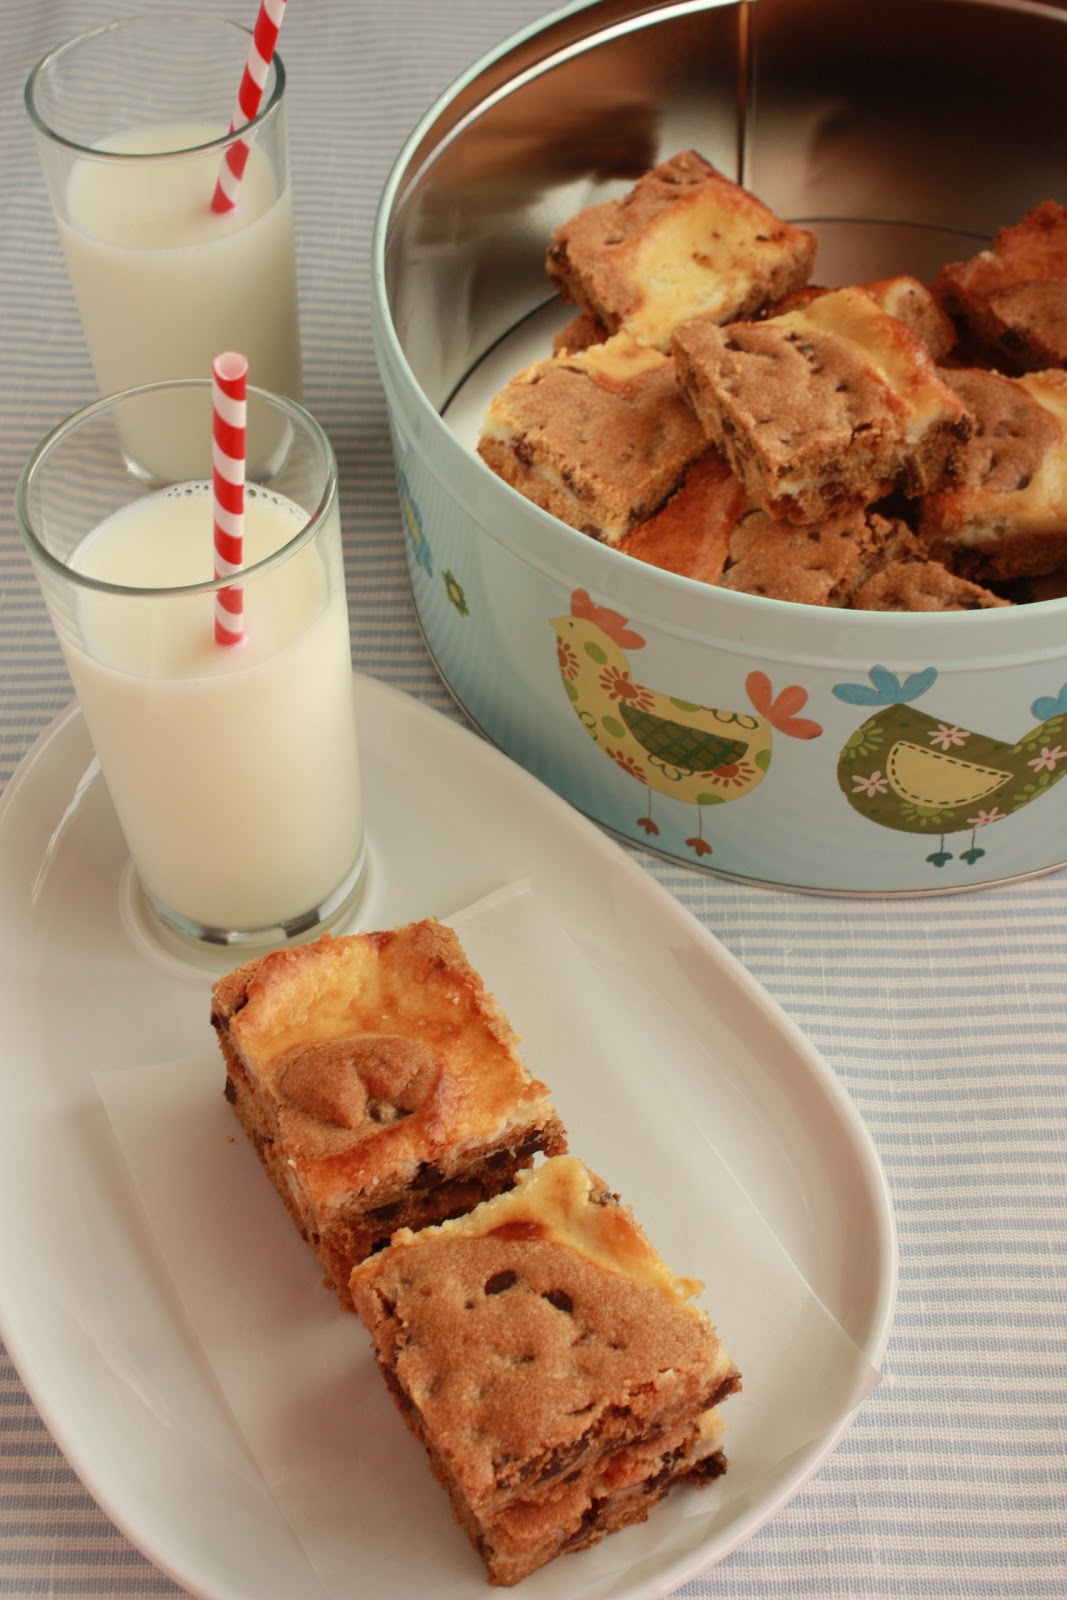
It was a fun day and i was really hungry when i got home. Ideal as i had also planned to make these Cheesecake Chocolate Chip Cookie Bars. I've had this recipe book-marked for awhile now. I'm so happy I came across it on the fabulous blog 'Traceys Culinary Adventures'. A day in the fridge after baking and these cheesecake and choc chip cookie hybrid bars were irresistible. I had three in a row and will be taking the rest into work to stop me from polishing off the lot.


Recipe - Cheesecake Chocolate Chip Cookie Bars 


Yield: Approx 28 bars

Ingredients:

Cookie Dough
64g unsalted butter, at room temperature
64g cup shortening
128g packed light brown sugar
64g cup granulated sugar
2 teaspoons vanilla extract
3/4 teaspoon salt
1 tablespoon cider vinegar
1 egg
1 teaspoon bicarbonate of soda
256g plain flour
256g semisweet chocolate chips

Cheesecake
227g/8 oz cream cheese, at room temperature
64g caster sugar
1 egg
1/2 teaspoon vanilla extract

Method:
Preheat oven to 350 F.  13 inch x 9 inch baking tray buttered or sprayed with cooking spray.
In the bowl of a stand mixer fitted with the paddle attachment, cream the butter, shortening, both sugars, vanilla and salt on medium speed until light and fluffy, about 3-4 minutes. I used a hand held beater.

Beat in the egg until well combined.  With the mixer on low, add the baking soda and flour and beat just until incorporated.  Stir in the chocolate chips.  Press half of the dough into an even layer over the bottom of the prepared pan (I found it easiest to use my fingers to do that).  Set aside the other half of the dough.
In the bowl of a stand mixer fitted with the paddle attachment, beat the cream cheese on medium until smooth and fluffy, about 2-3 minutes.  Again, i used a hand held beater.

Add the sugar, egg and vanilla and beat just until incorporated. (I rinsed the bowl of my stand mixer & used it here but you could also do this with a hand mixer in another bowl if you'd rather.)

Pour the cream cheese mixture over the cookie dough layer in the bottom of the pan and spread to the edges.  Use the second half of the cookie dough (that you set aside earlier) to top the cream cheese.  The easiest way to do that is to grab pieces and flatten them into discs between your hands then place them around the cream cheese layer.  You don't have to cover the cream cheese layer completely as the cookie mixture does spread abit.

Bake for 35-40 minutes, or until the top is brown and cooked through (the bars will begin to pull away from the sides of the pan slightly). Transfer the pan to a wire rack and cool for 30 minutes then store in the fridge for at least 2 hours before slicing into bars. Store covered in the fridge.

Enjoy!

Saturday, 25 June 2011

Chocolate chip and ginger cookies


A good friend of mine describes me as dizzy intelligent person. There have been enough embarrassing situations in my life to realise that she has a point.  Like the time when, on a train to Edinburgh, i thought i'd electronically locked the toilet door only to find as i was sat on the toilet, i hadnt. The shocked look on the elderly mans face as the door slid open to find me sat there will be forever imprinted on my mind.

As well as being abit dizzy at times i can be pretty clumsy. Today whilst setting up to shoot photos of these cookies i managed to knock over a large white foam board on its side, causing the two glasses of milk on the table to topple over. The milk went everywhere and i couldnt use the linens i wanted for the background. I had to do a big clean up and start all over again.

 
I wish i could say these cookies were worth the effort but unfortunately they werent. Since tasting the best cookie i've ever had in the Cotswolds purchased from a Bens Cookies stall http://www.benscookies.com/, I've been looking for a cookie recipe which may in some way match. 

The recipe i adapted is one from Joy The Baker for Black and White cookies http://www.joythebaker.com/blog/2008/12/black-and-white-cookies/ which had a nice cookie base. I like my cookies soft, almost undercooked and loaded with chocolate chips. These cookies certainly had a soft, almost cake like texture and the adequate amount of chocolate chips. But i made the mistake of adding nutmeg into the mix, giving the cookies an odd flavour. Next time I'll omit the nutmeg, up the ginger and consider adding in some chunks of stemmed ginger.


Recipe - Chocolate chip and ginger cookies (adapted from Black and White Cookie recipe by Joy The Baker)

2 1/2 cups plain flour
1 teaspoon baking soda
1 teaspoon salt
2/3 cup well-shaken buttermilk
1 teaspoon vanilla
2/3 cup unsalted butter, softened
1 cup granulated sugar
2 large egg
1 teaspoon ginger
1/2 teaspoon nutmeg
200g dark chocolate chips

Instructions:
Preheat oven to 180 degrees C.
Whisk together flour, baking soda, and salt in a bowl. Stir together buttermilk and vanilla in a cup. Beat together butter and sugar in a large bowl with an electric mixer until pale and fluffy, about 3 minutes, then add eggs, beating until combined well. Mix in flour mixture and buttermilk mixture alternately in batches at low speed (scraping down side of bowl occasionally), beginning and ending with flour mixture. Mix until smooth.
Spoon 1/4 cups of batter about 2 inches apart onto a buttered large baking sheet. Bake in middle of oven until tops are puffed and pale golden, and cookies spring back when touched, 15 to 17 minutes. Transfer with a metal spatula to a rack and chill (to cool quickly), about 5 minutes.